Equo SDK Development Environment
IntelliJ
Import Equo formatter
-
Go to Main Menu
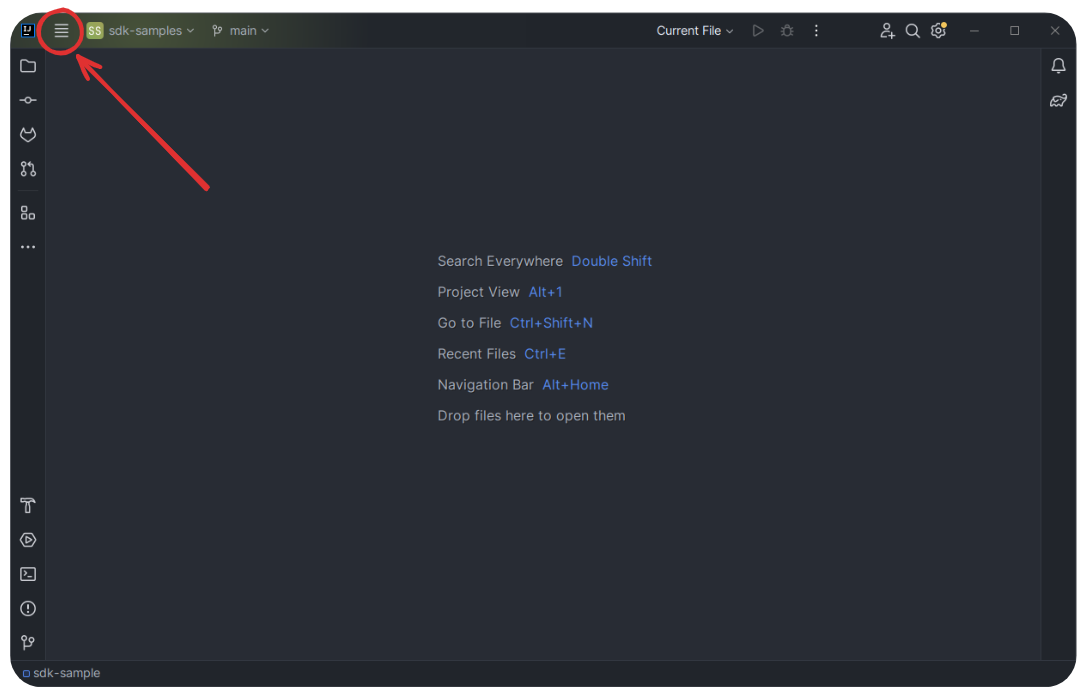
-
Open Settings…
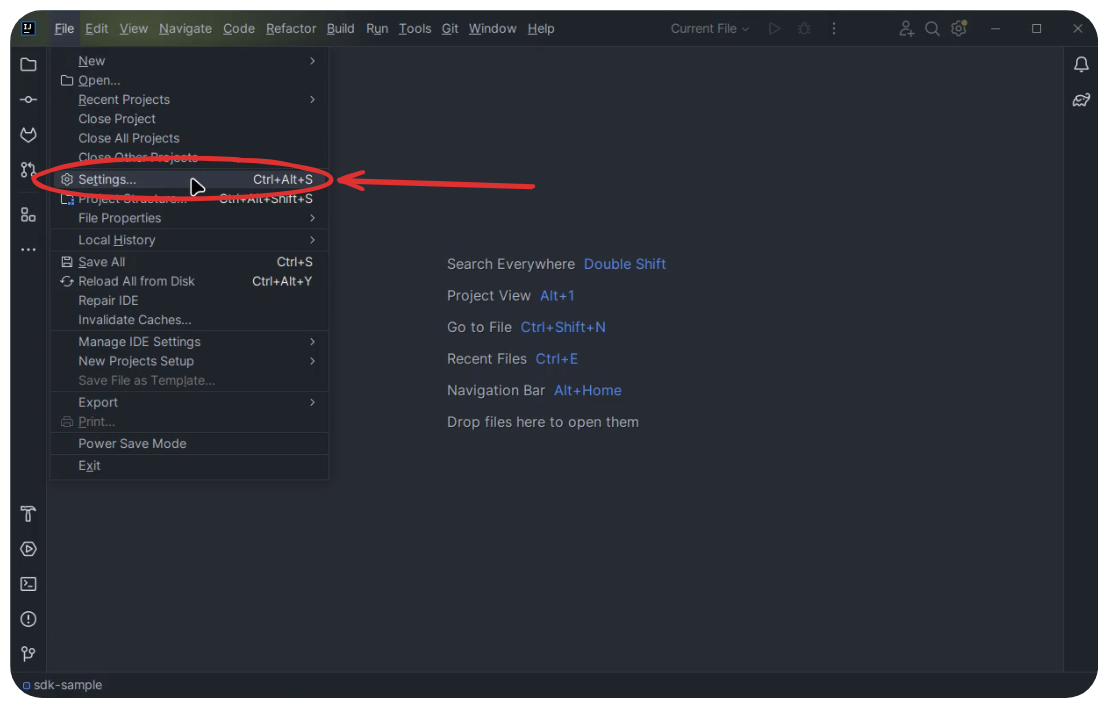
-
Go to
Editor » Code Style » Java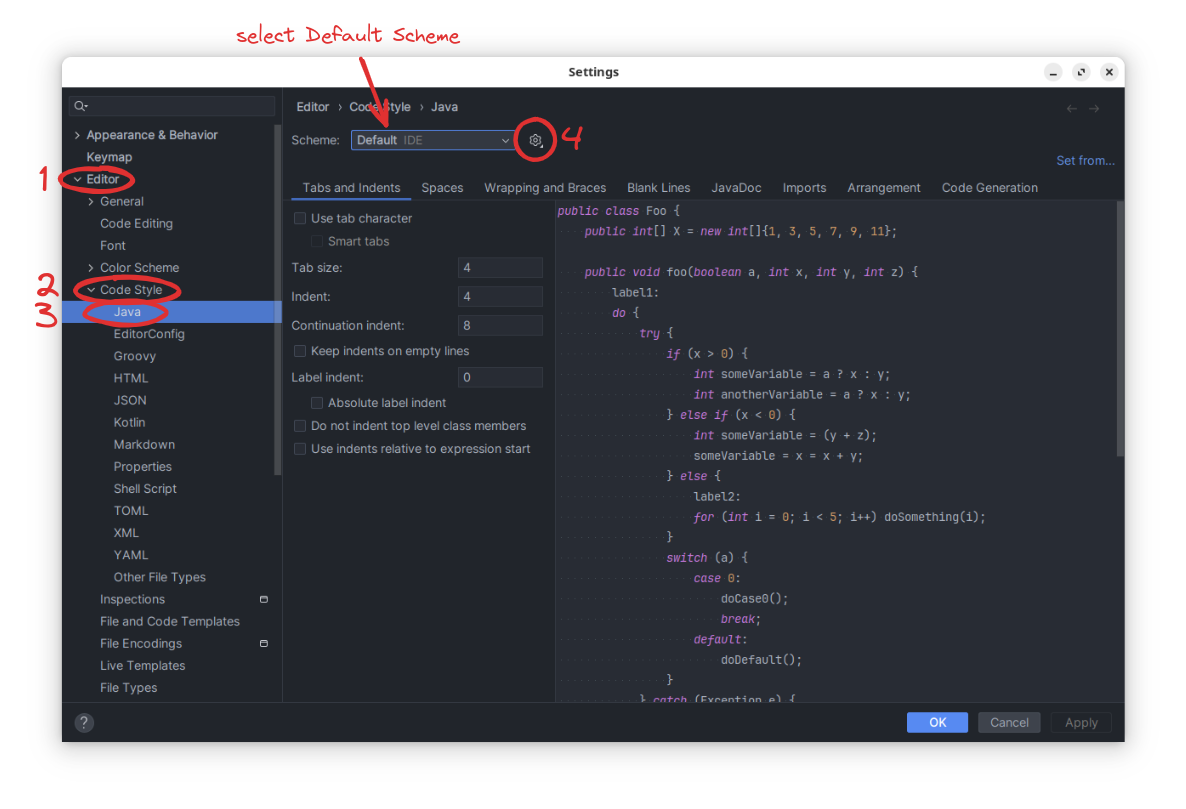
-
Select the Default Scheme and click on the gear wheel.
-
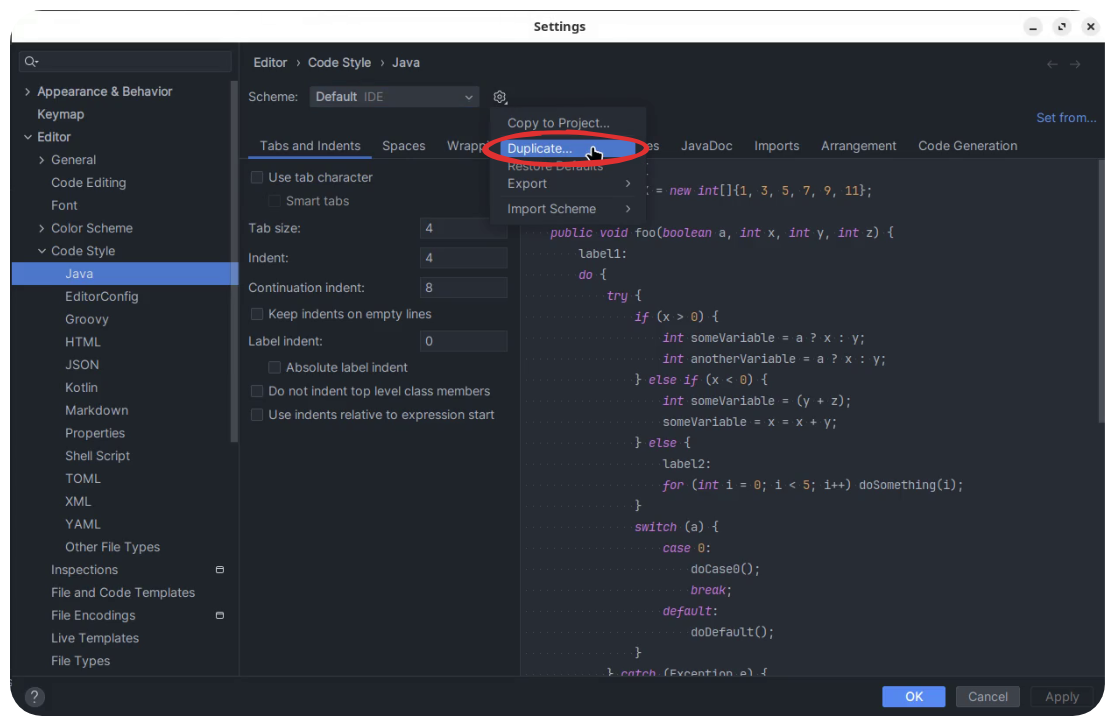
Select Duplicate…
-
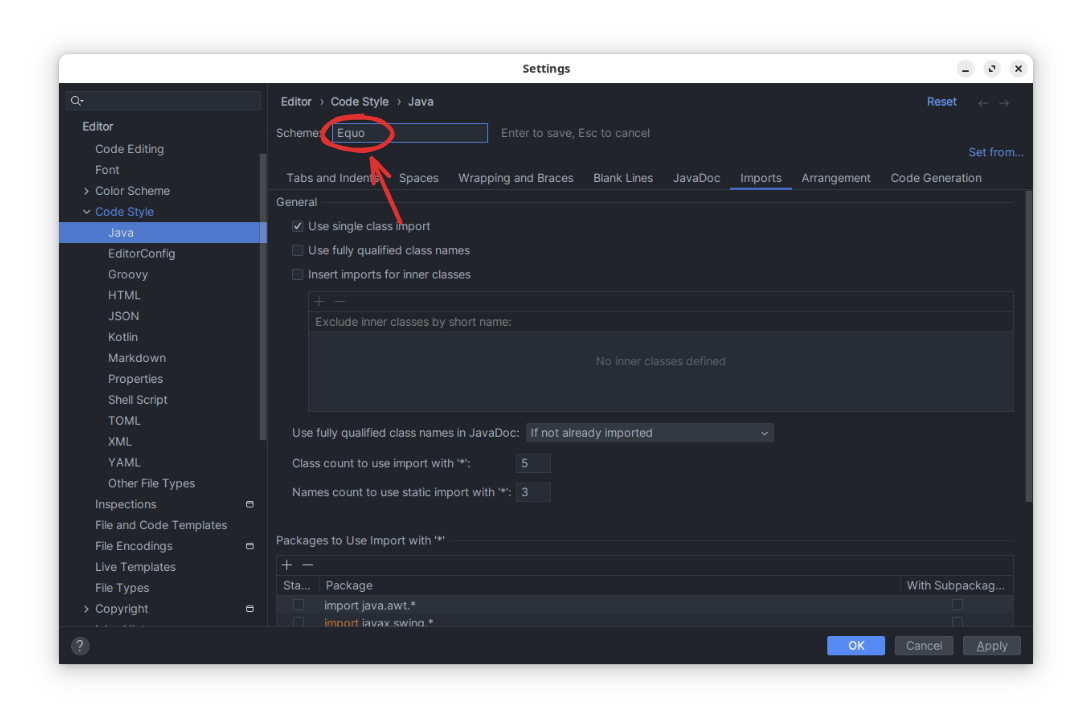
Write "Equo" on the name field.
-
Click on the gear wheel and Select
Import Scheme » Eclipse XML Profile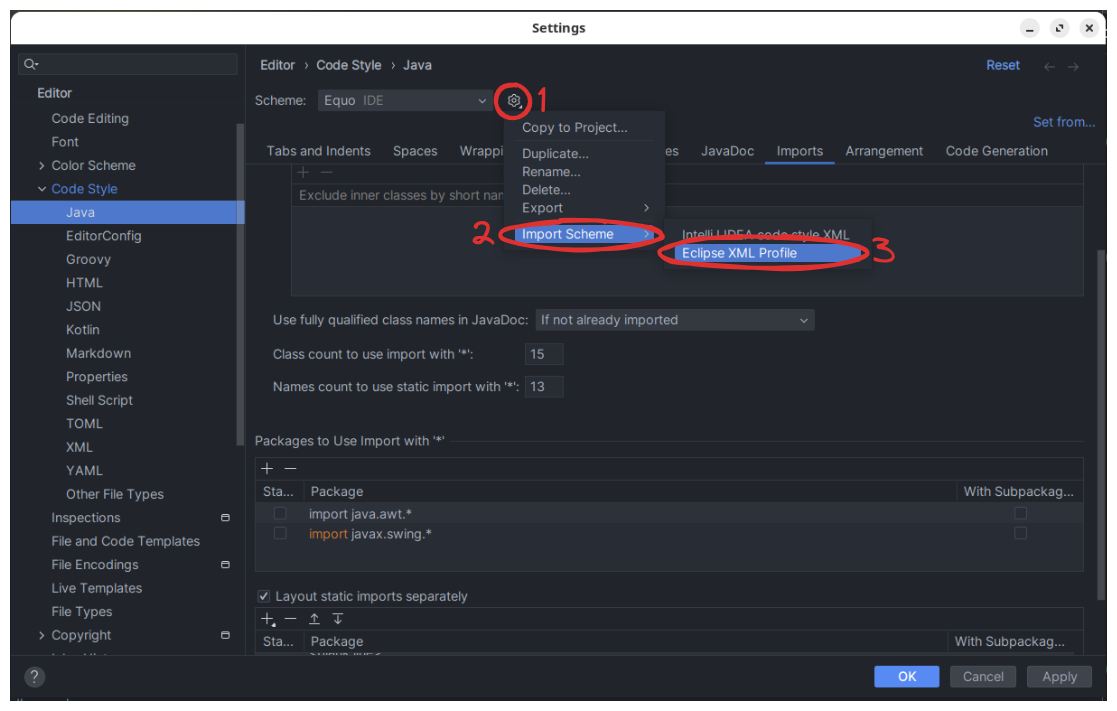
-
Select path to
Equo formattter.xmland clickOK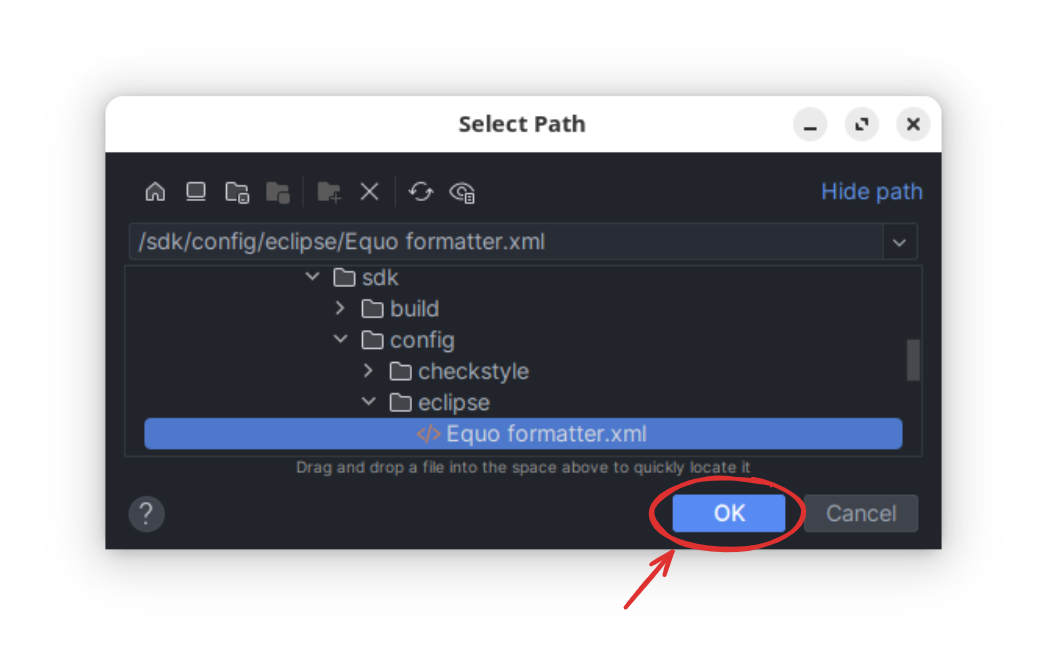
-
Go to
Importstab and set the next order packages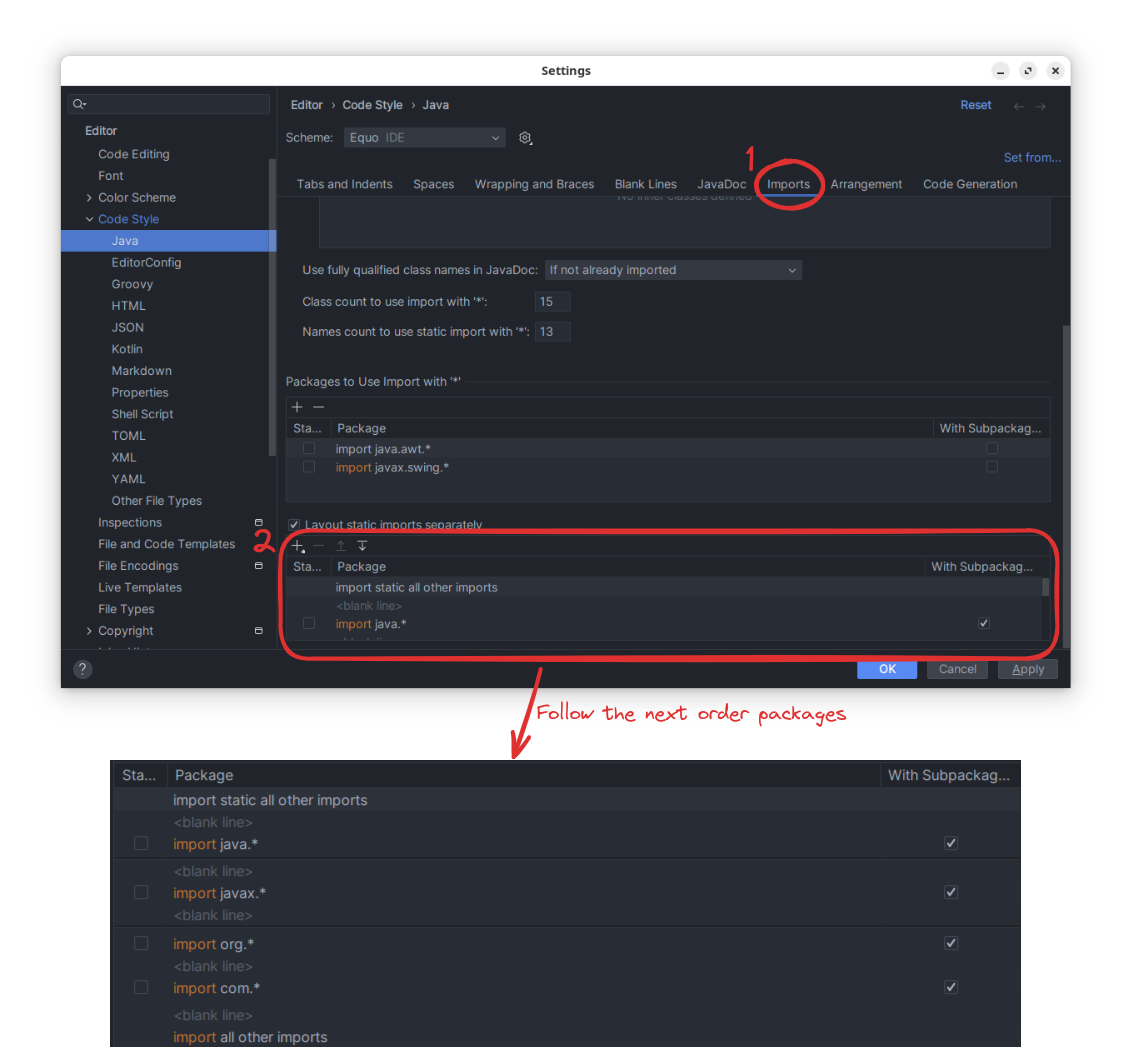
Eclipse
-
Download Eclipse Installer and run it (Click advanced mode button): Eclipse Installer.
-
Open the installer you just downloaded and switch to advance mode.
-
Copy the content of link: this file.
-
Go back to the Eclipse Installer, you will see a button in the toolbar which allows to paste the configuration you just copied to the clipboard. That’s the
EquoFrameworkConfig.setupconfiguration. Click that button. -
Click Next and then Finish to proceed with the installation.
Workspace Configurations
Once you open a new workspace in Eclipse (the IDE installed before), there are a few settings needed to work well with our SDK:
-
Configure compilance compatibility to generate
.classfiles for Java 11 (Window » Preferences » Java » Compiler). -
Import the checkstyle file to check Equo code styling as you are developing. For this, you need to:
-
Go to
Window » Preference » Checkstyle. -
Select
New…in the Global Check Configurations section. -
Change the type of the new configuration to
External Configuration File:-
Write "Equo" on the name field.
-
Import from this project the file located in
config/checkstyle/checkstyle.xmlin the location field.
-
-
Press Ok.
-
Select the recently created configuration and press the
Set as Defaultbutton. -
Check
Run Checkstyle in background on full buildsoption.
-
-
Import Equo formatter for Eclipse:
-
Go to
Window » Preference » Java » Code Style » Formatter. -
Press
Import…and select the file of this project located inconfig/eclipse/Equo formatter.xml. -
Apply changes.
-
